When young guys first get in the gym, the first muscle group they think of and want to hit is their chest. It’s not uncommon to see a young guy that hits 20-40 sets of bench presses in one workout in the gym. The bad news is if you’re hitting 20-40 sets of bench presses every single day, you’re either going to end up with a shoulder injury or at the very least bad posture.
As we go through this article, we want to teach you not only how to be more efficient in your chest stretching but taking that to the next level with our 17 best chest stretches for tight muscles.
In this article, we’re going to cover the muscles, bones, joints, and all the individual movements they create. Let’s go ahead and jump right into the anatomy.
Jump to:
- Chest Anatomy and Functions
- When Should You Stretch Your Chest: Benefits of Stretching the Chest
- Dynamic and Static Chest Stretches
- How to Stretch Your Chests: 17 Best Chest Stretches
- 1. Chest Opener
- 2. Rear Arm Raise
- 3. Corner Chest Stretch
- 4. Clasp Hands Behind Back
- 5. Chest Stretch With Strap
- 6. Floor Chest Stretch
- 7. Wall Chest Stretch
- 8. Behind the Head Chest Stretch
- 9. Camel Pose
- 10. Doorway Chest Stretch
- 11. Counter Twist
- 12. Thread the Needle With Chest Opener
- 13. Rotations With Hands Behind Head
- 14. Back Bend
- 15. Prone Chest Stretch
- 16. Back Extension
- 17. Bow Pose
- Our Tips for Best Chest Stretches
- Common Mistakes
- Best Chest Stretches: FAQs
Chest Anatomy and Functions
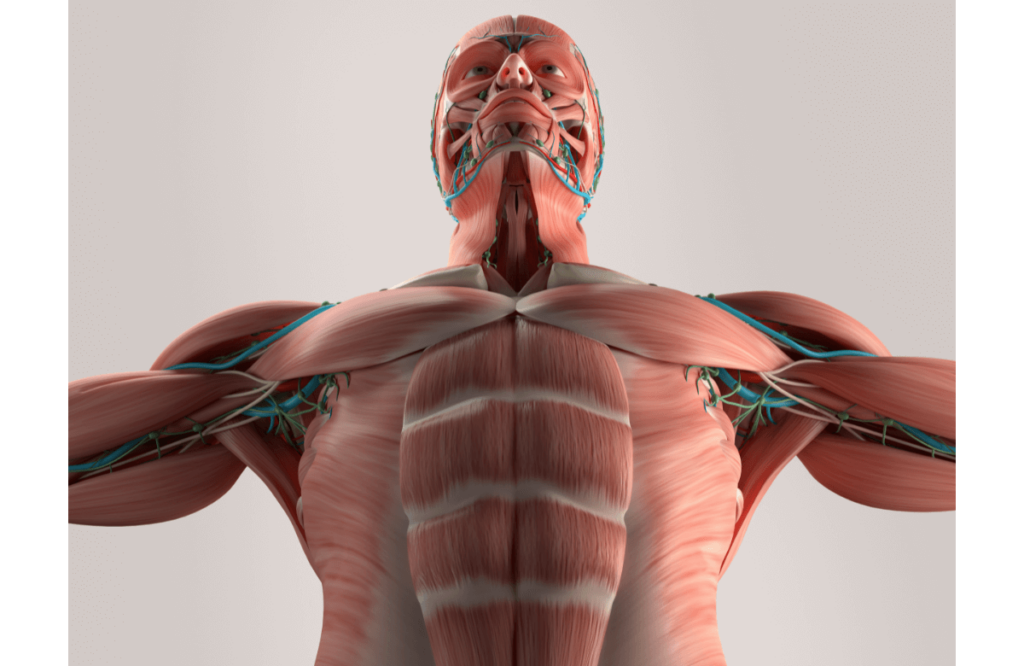
When we’re talking about chest muscles, we’re going to focus on three primary muscle groups. The first one and the one you’re probably most interested in is your PEC major.
1. Pectoralis Major
That’s your big chest muscle. There are three subsections within your pectoralis major muscle:
- The clavicular head runs from your clavicle, comes down and across, and attaches to your humerus or your upper arm bone;
- The sternal head that runs from your sternum, all the way comes across and also inserts into your humerus or your upper arm bone.
- There’s a third head and it’s called the abdominal portion of your pec. It runs from your rectus sheath, which is a big part of connective tissue, and comes up and across. It also attaches to the humerus.
These three unique subsections of your pectoral muscles are major players. Most times a lot of people are going to struggle with the top portion of the clavicular head. So, we’re going to make sure we show a few key stretches to make sure you’re hitting this area.
All of the sections of the pectoralis major work together to create internal rotation of your shoulder and horizontal adduction. The clavicular head is responsible for shoulder flexion like you would when you raise your arm up overhead.
2. Pectoralis Minor
The second key muscle group we’re going to focus on is called pec minor. This is a small muscle group, situated beneath the pectoralis major muscle. You’re probably not going to want to spend a lot of time in the gym trying to develop it but it also needs stretching.
It runs from a little bony prominence on the top of your scapula called your coracoid process. Then it comes down and attaches to the ribs on your ribcage. This muscle improves your breathing in your respiration.
3. Serratus Anterior
This muscle is absolutely critical not only for a nice balanced physique but for developing good healthy shoulders as well. The serratus anterior starts on the inside of your shoulder blade, wraps around, and connects onto the front of your ribcage.
Let’s take a look at the benefits of stretching the chest muscles.
When Should You Stretch Your Chest: Benefits of Stretching the Chest
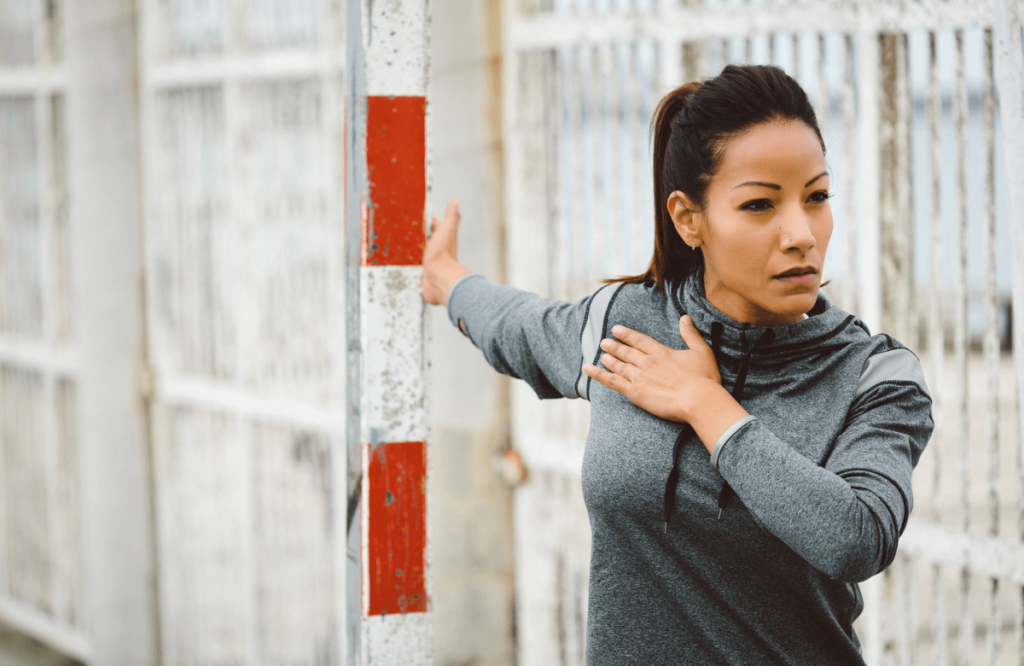
A lot of us get our cardiovascular exercise in, get our strength training exercise in and forget about the importance of stretching. Here is why you need to stretch your chest muscles.
1. Better Posture
In this technological era, machines have reduced the need for manual labor. People spend large parts of their days sitting at their computers with poor posture. Slouched shoulders and hunched backs also affect the circulation and hormone regulation of your body. The effects become increasingly evident with age.
Fortunately, stretching can help correct posture and avoid other problems related to bad posture. It helps release tension in the muscles that have become used to the years of poor posture. However, you cannot fix your body posture overnight. Stretching regularly for a long time will eventually correct your posture.
2. It Prepares Your Muscles for Daily Activities
Dynamic stretching warms up your cold muscles and slowly increases your range of motion from being sedentary to the motion you want to do.
For example, you play a lot of tennis. You’re not going to go from sitting on the couch to immediately hitting overhead serves; otherwise, you are going to end up hurting your shoulder joint because it’s immediately taking it from being used to a small range of motion.
Therefore, what you’re going to do is a dynamic stretch where you’re slowly increasing the range of motion of your shoulder until it’s ready to do the motion that you need. So, you want to focus on dynamic stretching before the activity. That’s going to be even walking, jogging, or upper-body training.
3. It Helps You Relax
Static stretches are important after an activity or after we’ve been in a posture for a long period. It helps your muscles release and relax.
When you’re performing both strength training and cardiovascular exercise, you’re contracting your muscles over and over again. After you’re done with that, it’s nice to be able to hold the stretch and let those muscles elongate back to their more natural state.
Dynamic and Static Chest Stretches
You definitely know, or at least heard, that stretching has many beneficial effects on your health and your athletic performance. And there exist many different stretching methods from which you can choose. But all of them can be divided into two major types: static and dynamic. Which of these is the better one?
First of all, we will give you a general overview of the different stretching methods and then we will compare them. Let’s start with static stretching.
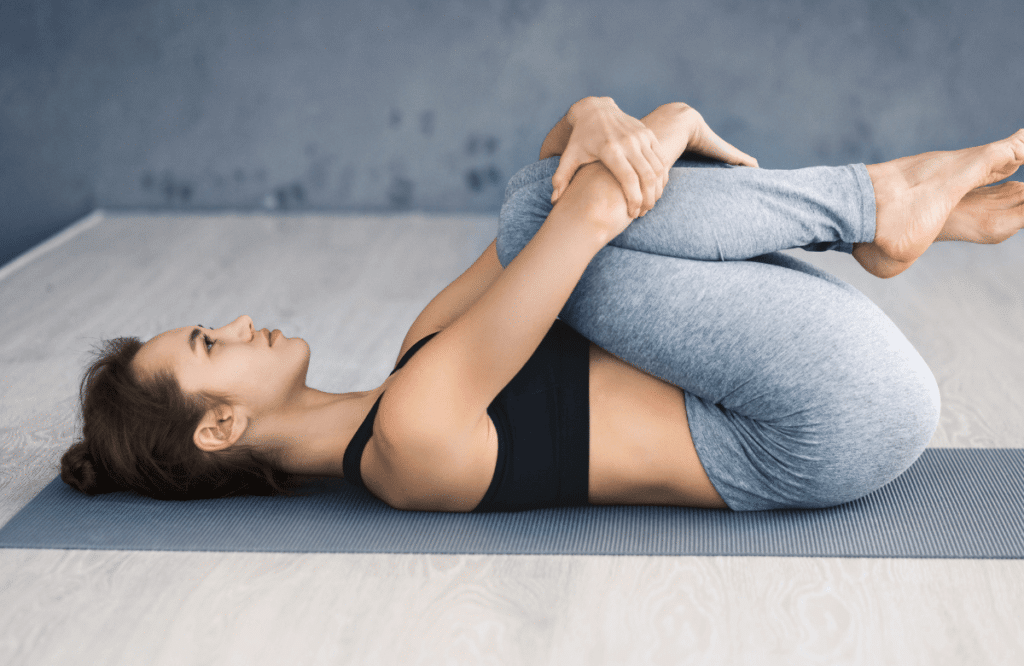
Static Stretching
Static stretching means stretching the muscles to the farthest point and holding the position without any other movements involved. There are a lot of static stretching methods.
1. Passive Stretching
One of the static stretching methods is the passive one; the muscle you want to stretch is completely relaxed. You move your body into a position where muscle tension of the target muscle increases and you hold this position for at least 20 seconds.
To increase the intensity, you can help yourself with an object, for example, a chair, where you can put your leg. But take care: increased intensity means a higher risk of injury.
2. Active Stretching
Another type is active stretching. In this type, you use one muscle to stretch the other one. That means contracting your agonist to stretch your antagonist – and the contraction of one helps in the relaxation of the other.
An example would be to stretch one leg in the air: the agonist is completely under tension while the backside is relaxed and stretched. As active stretching positions are pretty intense you should and usually can only hold the form not longer than 10 to 15 seconds.
3. Proprioceptive Neuromuscular Facilitation
And another static stretching method would be proprioceptive neuromuscular facilitation (PNF). The PNF is a method that both contracts but also stretches the target muscle group. And this method is for people who are a bit more experienced in stretching already.
It’s highly effective and originally designed as a technique for rehabilitation. You can target specific muscle groups and increase flexibility as well as muscle strength enormously.
The order is more or less like this: you position the muscle group so that the muscle is stretched but also under tension. You contract the muscle groups for up to 10 seconds while a band or a partner applies resistance to inhibit movements. Then relax the target muscle for 5-10 seconds.
Lastly, you with your resistance band or your partner apply a deeper stretch into a greater range of motion for up to 30 seconds. And you can repeat the whole procedure a couple of times.
There are, of course, many other variations and methods, for example, isometric stretching.

Dynamic Stretching
And now let’s talk about dynamic stretching. Dynamic stretching methods in contrast to static ones always have a swinging motion with them.
1. Ballistic Stretching
In ballistic stretching, you take the momentum from a rotary motion to force the stretching of one muscle group out of its usual range of motion. It’s a pretty rough and aggressive method and we would not recommend that to beginners as the risk for injuries is relatively high and the muscles don’t have time to adapt to the new stretch.
2. Classical Dynamic Stretching
Then we have the “classical” dynamic stretching. These chest stretch exercises in contrast to ballistic ones focus on slow spring motions to slowly push the muscle out of its range of motion. No fast abrupt movements should be performed here.
3. Active Isolated Stretching
Then there is another method called active isolated stretching (AIS). You position yourself, contract the agonist of the target muscle you want to stretch, and then you slowly move into the entire stretch and you hold it for like two seconds.
Our body has a protection mechanism when we overstretch at a certain point. And with this method, you basically step with one foot over the threshold and then back.
How to Stretch Your Chests: 17 Best Chest Stretches
Now we are going to show you some very simple but efficient chest opening stretches.
1. Chest Opener
For the first one, start by standing up straight. You want to feel like you’re pushing your chest forward a little bit as well as pulling your arms back. So, pull your arms back behind you and squeeze your rhomboids and trapezius muscles as tight as you can.
To get a little bit different part of your chest muscles, go from a little above your shoulder to a little below your shoulder. It’s a nice slow motion slowly traveling up and down.
The harder you squeeze, the more calories are going to burn, and the more stretch you’re going to get out of this. Keep pulling it as tight as you can for 30-40 seconds. Then relax and roll it forward with your shoulders.
2. Rear Arm Raise
A rear arm raise is similar to the previous stretching exercise. You want your arms back behind you but instead of pulling him out, you’re going to pull them up back behind you. This is for stretching the chest muscles and the front of your shoulder muscles.
Use your rear deltoid muscle to pull your arms up. It doesn’t matter how tight you squeeze your arms back behind you. You don’t have to worry about pinching your shoulders back more. Just bring your arms up and keep your lungs open. Just breathing normally.
Your shoulders should actually start getting pretty tired by the time you’re done with this. It should be 100% maximum range of motion every single second you’re pushing through this. The longer you hold it, the more your ligaments and tendons are going to loosen up.
3. Corner Chest Stretch
For the next stretch, you need to find a nice empty corner where you can get close to it. You are going to step into the corner and put one foot in front of the other, like a staggered stance. And then you’re going to put each hand on one of the walls. So you’re right going forward into the corner.
You’re going to bend your front knee forward and lean your body into the wall like you’re trying to put your head into the corner. You want to squeeze your shoulder blades back, just like if somebody had their hand right on the middle of your back. And you’re trying to squeeze them together.
So, lean forward, hold it for 30 seconds, and then come back out. You’re going to do that 3-4 times.
If you want to get your upper chest muscles involved a little bit, you can bring your arms a little higher up and then again, lean in, bend your front knee forward, and squeeze your shoulder blades back. Hold it for 30 seconds, and do that 3-4 times each.
4. Clasp Hands Behind Back
This is an exercise that you can do daily and you can do it as many times as you want to open up your chest and shoulder area. This deep stretch is simple and you don’t even need any equipment.
You want to take your hands and lock them behind your back. You’re going to push your arms up, and push your chest outwards. It’s a combination move. Then push your hands down and back, and push your chest out. And hold that for 30 seconds, 3 times each.
5. Chest Stretch With Strap
If your chest muscles put you into the rounded shoulder position and you don’t have a lot of mobility in your thoracic spine, you need to release your pecs as well as shoulders.
A lot of people perform this exercise using a wooden stick. We recommend you to use a resistance band because it gives a little bit of a leeway.
Grab a band and just pull it all the way back. Bring it all the way down and then bring it the other way. That’s all you’re doing; you’re just going up and over. You’re giving some mobility to your shoulders and chest.
Here are a few tips for performing this chest exercise in a proper form.
1. Not shrugging shoulders
The first thing is you don’t want to be shrugging your shoulders. If you’re doing this, that’s not good and you’re not going to feel much of your chest opening up. So, keep your shoulders down the whole time when you’re doing this.
2. Stomach in
Secondly, you don’t want to arch your low back and let your stomach out. This is the wrong way. You’re trying to get mobility just in the chest and shoulders area, not in your low back. So, it’s very important to keep that tip in mind.
3. Enough slack on the band
The other thing is don’t grab it too tightly. If you grab it too tightly, you have to contort yourself to be able to get through it. That’s not good either. Make sure it’s comfortable and just a little bit challenging but not too challenging that you cannot do it in a proper form.
Find out which elastic band works for you. Make sure you’re doing 20-30 good reps.
You don’t need your hands to be almost touching each other. That’s not the point. The point is to get some mobility to open it up. Also, it’s about consistently doing this. That’s going to give you those results. It’s not about just doing it once and doing it the hardest that you can.
6. Floor Chest Stretch
The next stretch for the chest is going to be on the ground. It is a nice relaxing stretch for your chest and shoulder area. You’re going to lie down on your back and then you’re going to cross your leg over. Once your knee gets over, the opposite shoulder is going to be the one you’re going to stretch.
You’re just going to relax your body and put your arm straight out. You’re going to take a deep breath in and then relax. When you breathe in deeply, your arm goes off of the floor. And that’s how you stretch out that chest and shoulder area.
You can do that about 5-10 times. Back down, and then switch sides and do the same thing on the other shoulder.
7. Wall Chest Stretch
For this pec stretch, you’ll need a wall. A wall gives you the best support from fingertips to shoulders.
You are going to place your arm on the wall. Your aim is about a 45-degree angle. However, it’s a fan-shaped muscle so any height of your hand is going to stretch the entire sheet of the pecs.
What you’re going to try to do is to get the front of your shoulder as close to the wall as possible. And then you also want to relax your shoulder away from your ear. So, you’re not hiking the shoulder up but you’re letting it depress.
You can use your other hand to stabilize. Make sure that you breathe. If you are crazy bendy, you can also try to rotate your ribs away from the wall. Hold that stretch for about 90 seconds to two minutes and then switch sides.
8. Behind the Head Chest Stretch
This exercise mainly targets your chest, upper back, and arms.
You are going to stand straight with your feet slightly apart. Then place your hands at the back of your head and push your elbows as far back as you can while squeezing your upper back. Hold this position for 20 to 30 seconds breathing slowly. You should feel a stretch on your chest near the underarms.
Then gently try to pull your elbows to the sides with your hands still behind your head for 30-40 seconds. Repeat this exercise 2-3 times.
9. Camel Pose
For the camel pose, you are going to start in a kneeling position. Come down onto your knees and sit back on your heels. You have your knees roughly about hips distance apart. Squeeze your inner thighs together. For a more beginner variation, you could start with your toes curled under.
Before moving on to the actual posture, you need to warm up your back. Bring your hands to the lower back, lift your chest up, move your hips forward over your knees, tuck your tailbone, bring your shoulder blades back, and bring your gaze slightly up.
For more advanced variation, bring your hands down to your heels with your toes curled under. Press your thighs forward, lift your chest up, squeeze your thighs together, and bring your gaze up or slightly forward. And if you want more of a stretch, come on to the top of your feet.
10. Doorway Chest Stretch
This chest stretch engages the pec minor more. To begin, take a nice stride stance, stand in the doorway, and then put your arms out. The elbows are resting just below shoulder level. And then slowly bring your chest forward, being careful to not pull with your back or your head.
You should get a nice mild-to-moderate stretch in your chest or upper arm area. There shouldn’t be any pain but slight discomfort. Focus on keeping your neck relaxed. Hold that stretch for 30 to 60 seconds and then slowly come out of it.
Bring your arms down, do a couple of shoulder rolls, keep some blood flow to the neck, and then repeat with the arms a bit higher. Never pull with that back; that’s the most common mistake people make with this. Perform 3-5 repetitions. This is a great exercise long term to keep your chest open.
11. Counter Twist
For this stretching exercise, you are going to get started on hands and knees. Slightly lift your ribs up. You’re going to take a deep inhale. On an exhale, just take a big backstroke of your left arm, sweep it up and back, and then switch sides.
What you’re trying to do is build a little bit of heat in the chest so that those muscles get a nice stretch. Lots of blood flow and oxygen help muscles relax into stretches a little bit more. Go slow with opening the chest. A common mistake is to exacerbate extension in your low back.
Think of going a little smaller at first and building that up, always prioritizing feeling good rather than trying to get a big range.
12. Thread the Needle With Chest Opener
This exercise aims to increase the mobility in your thoracic spine and open your chest. It requires no special equipment, just something to protect your knees. For example, an exercise mat or a towel.
For this exercise, you will need to place your hands and knees on the comfortable surface. Keep your hands under your shoulders and your knees under your hips. Your pointer finger is pointing straight up your yoga mat.
You are going to slide your right arm under your left arm as far as you can until you feel a stretch through your thoracic spine. Then open your chest out and reach the same aim, up towards the ceiling, pushing away from the floor with your supporting arm. Pause and hold this position keeping your hips right over your knees. Then stay at the bottom.
You can bend the left elbow. Some people will have to bend it more than others. Ideally, you keep it as straight as you can but bending is okay.
Repeat this stretch 10 times with the right arm. Once 10 reps are complete, you can switch to the other side for a further 10 times.
The other variation we’re going to show you is going to force the upper back to do even more. If you sit your butt to your heels and try the same exercise, it’ll be better because you’re less inclined to rotate through your low back.
13. Rotations With Hands Behind Head
One of the best ways to help open the chest is to find a lot of twisting to relieve tension in the mid back. That’s what we’re going to show you.
Sitting on the ankles or with crossed legs, you’re going to take your hands back behind your head and twist your chest to the left and the right. Then try to get a little bit bigger in your range of motion. Hold that stretch position for 30-40 seconds. Make sure your shoulders are relaxed. Do not force rotations beyond the natural end point of movement.
14. Back Bend
For this one, you’re stretching not only your chest but your hip flexors, quads, and all of the front-line muscles.
Sitting on your ankles, your right hand is going to go to the right heel of the foot, and your left arm is going to go forward. Lift the hips up, sweep your arm overhead, and lower down. Then take a little counter twist to the left. You’re going to use your body’s natural momentum of going side to side to bring the hips up and open that chest.
If this position is not accessible for you, what you can do is grab anything that you can lift up. For example, a stack of books or some yoga blocks. And you can go ahead and take your hand up onto those yoga blocks. It will help you a lot to get into that range.
If you have it, you can start to take this into more of a backbend each time. Don’t forget to squeeze your glutes.
15. Prone Chest Stretch
For this arm chest stretch, you’re using your body weight to open up your chest area. What you are going to do is lay down onto your stomach, straighten your arm, and rotate away. You can use your other hand to push away. Remember that raising the arm above shoulder height increases the stretch. Focus on elongating your lower pec muscle.
If you feel like you’re maybe getting some neural symptoms, what you can do is bend your bottom elbow a little bit to slack in the nervous system. So, push away and allow your pectoral muscles to elongate.
Then you are going to get a little bit deeper into the front of the shoulder. So, you’re going to go ahead and twist to the side. Bring the lower shoulder as close to the yoga mat as you can. Then switch it and twist to the other side.
16. Back Extension
You are going to lie down onto your belly. Your arms are going to be long by your side. Gently lift your upper back up, pull the shoulders together, and open your arms up. Hold this position for 20-30 seconds.
Bring your arms back to the side and lower your upper back down. Push the floor with the forearm around your back and sit your pelvis back. If you want to increase this gentle stretch, you can bring your arms forward and find a little bit more lift.
17. Bow Pose
Firstly, you are going to lie down on your stomach. Then bend your knees and hold the ankles with your hands. While inhaling, raise the thighs, head, and chest as high as possible. Try to maintain the weight of your body on the lower abdomen. Join the ankles, look upward, and breathe normally. Maintain this position as long as you can.
Make sure you inhale and exhale deeply. Slowly come back to the original position. Once you master this position, you can also try a variation by bringing your feet towards your shoulders and arching your head and shoulders backward.
Our Tips for Best Chest Stretches
1. Hold Stretches For at Least 30 Seconds
Make sure you hold your pectoral stretches for at least 30 seconds. Give your muscles enough time to relax and release into your stretches to improve your flexibility.
Your muscles have a stretch reflex. So, if you stretch too quickly and too aggressively, they actually protect themselves by contracting. We want to be able to bypass this stretch reflex by stretching gently. Make sure you’re giving your muscles enough time to know that it’s safe and that we’re working on that flexibility.
We recommend holding your pectoral stretches for 5 long deep breaths. This is usually around 30 seconds. The best part about counting your breaths is that you don’t have to sit there watching the clock ticking down. You can just close your eyes and really focus on your stretch.
If you do have a little bit more time, we do suggest trying to try and hold your gentle stretch for 10 long deep breaths so more towards the minute mark. This is going to allow your muscles to relax and deepen into the deeper stretch improving your flexibility.
This talk about breathing brings us to our second tip, which is to stretch twice.
2. Stretch Twice
This can be difficult especially if you’re rushed for time. But if you do have the luxury of spending a little bit more time on some of your stretching sessions, we do recommend to try and hold each stretch twice.
If you think about the first time, your body goes into a stretch, it’s just trying to relax and release and memorize that movement. If you come out for a couple of seconds, give your body a nice big shake, and then move back into that stretch, your body already knows where it’s been. It means you can normally push a little bit deeper into that stretch really working on improving your flexibility.
3. Remember to Breathe
It can be so common especially if you are quite inflexible and you find stretching uncomfortable to hold your breath. As soon as you hold your breath, your body goes into fight or flight mode. It starts to tense up and the stretch becomes really uncomfortable.
The best thing to do is to concentrate on your breathing. Do a nice big breath in through your nose and out through your mouth. This allows your body to know that it’s okay and to start to relax into the stretch. The best part about taking deeper breaths is that it also relaxes our nervous system and oxygenates the body. So, this is super beneficial after a chest workout, even first thing in the morning when you wake up to get energized or last thing at night to really help relax your body muscles before you go to sleep.
Common Mistakes
1. Doing Only Static or Passive Stretching
The latest research is showing that static stretches actually weaken the muscle. It has less power and strength after holding a passive stretch for 30 seconds. In fact, that alone is a good reason why not to do only static or passive stretching before a workout. This is where dynamic stretching comes in. The definition of dynamic stretching is having the muscles stretched while moving.
The type of dynamic warming up turns on and wakes up your nervous system.
In dynamic stretches, you’re controlling your movement and you’re not bouncing. Bouncing forces of body parts beyond their normal range. Dynamic stretching encourages length, strength, and control.
The goal of stretching is to lengthen the body’s muscle. What a lot of people don’t know though is how the fascia which is a form of dense connective tissue can influence your stretching efforts.
Fascia is like a cobweb that runs throughout your body. It surrounds each muscle and connects with other fascia connecting to other muscles. It creates continuous lines of pull through the body. What’s so important about fascia and stretching is understanding that there may be tightness in a different area of the body that is influencing your intended stretching area.
2. Inconsistencies in Your Stretching Efforts
When you first start stretching a new area of the body, the muscles respond as if they’re a yo-yo. You stretch, the muscle lengthens and then over a short period, it shortens back to its original length. To more permanently change the length of that muscle, it will take repetition and consistency in your stretching efforts.
It is much better to do consistent shorter stretching sessions throughout the day over just stretching at workouts or saving up your stretching to do one long stretch session a couple of times a week.

3. Stretching Too Quickly and Strongly
There is an important muscle concept called the stretch reflex. In very simplistic terms, the stretch reflex is a protective response to a sudden pull on a muscle. When a doctor checks your reflexes by tapping with that little hammer just below the knee, the sudden kicking of your leg forward is an example of a stretch reflex.
When you’re doing a bouncing motion, what’s creating the bounce is the muscle contracting and shortening when it gets to its end length and helps to bring you back up.
In stretching, many people trigger the stretch reflex by putting too much effort or pulling into their stretch. They think they are getting a better stretch because frankly it hurts and it feels like a really strong stretch. But what’s actually happening is they’re putting such a strong pull on the muscle that the muscle responds by contracting to protect itself from tearing.
So, you’re trying to stretch it and the muscle responds by shortening. This type of stretching effort will give you that deep soreness the next day which is counterproductive to your stretching efforts. Because now you have to rehab the muscle from the sudden overtraining.
Soreness isn’t bad. Sometimes it’s a sign of using muscles that haven’t been used in a while. But putting too strong of a pull and stretching too quickly can trigger the stretch reflex and be counterproductive to your flexibility goals.
Best Chest Stretches: FAQs
How do you stretch out your chest?
You need to incorporate into your fitness routine some effective stretches on a daily basis in order to get relief in that chest area. Here are the best chest opening stretches: camel pose, active doorway stretch, bow pose, and clasp hands behind the back.
How do you release tight chest muscles?
You can use the following chest opening stretches to release your sore muscles: counter twist, rotations with hands behind the head, prone chest stretch, and wall chest stretch.

