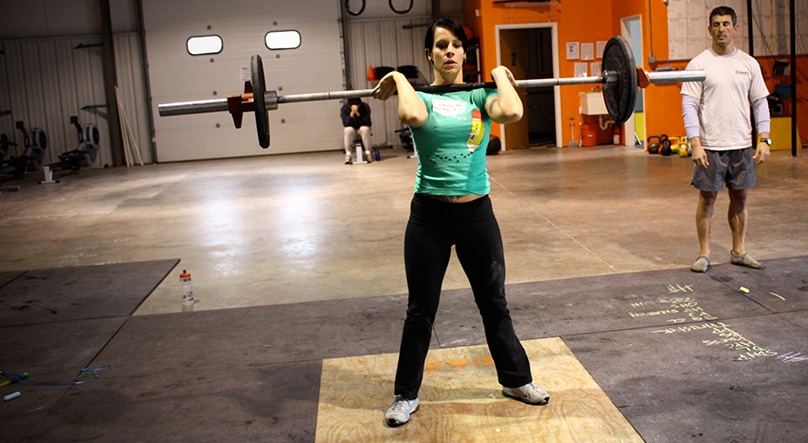
How’s your front rack position? Do you wince with pain in your wrists when the barbell forces them back, swing a kettlebell overhead, or even try to complete several push-ups in a row? I’m sure you are not alone. In fact, I’d wager that almost every CrossFitter has experienced some sort of wrist pain in their training career.
There’s a reason why CrossFitters and Olympic Weightlifters alike invest in wrist wraps and straps. The amount of stress and tension being placed on the wrists from heavy weight can create a lot of pain, and when combined with a lack of attention to the flexibility of the joint (not to mention working at an office where you are required to use the computer all day) this can quickly lead to poor wrist mobility, an inability to get into the front rack position—thereby limiting one’s capability to execute a lift—and the risk of creating further damage and injury.
The wrist sounds pretty important now doesn’t it? Let’s negate this crucial joint no longer and focus on how we can keep our wrists healthy so as not to affect our performance at the box—not to mention our quality of life outside it.
Jump to:
The Wrist Joint
The wrists are a complex joint full of bone, ligaments, connective tissue, muscles and nerves. It also has multiple ranges of movement—flexion and extension (moving the palm backward or forward relative to the forearm), adduction and abduction (moving the hand from side to side). Compare this to the movement of, for example, the knee joint, which only has flexion and extension. It also marks the area of transition between the forearm and the hand—so the health of the wrist can directly impact your grip strength (more on that later).

Another thing to consider is that if we lack motion at the wrist, we’ll try to make the motion up at the shoulder and elbow. Conversely, if we lack shoulder mobility, we’ll try to make it up at the elbow and wrists. It is therefore just as important to focus on scapular and shoulder mobility as it is on the wrist, as the two are interconnected and focusing on one may not alleviate the problem for the other. As an example, in the catch phase of a clean, we need to have adequate wrist extension, forearm pronation and external rotation of the shoulder to allow us to receive the bar on the front of the shoulders and fingertips. Ideally, one would have enough mobility to keep a closed grip on the bar with the elbows high and the bar resting on the shoulders. However, when attempting a heavy clean (and jerk) this is pretty hard to do, which is why you usually see Olympic lifters bounce the bar of their shoulders and re-grip the bar when they come out of the hole before attempting the jerk. If the wrists are stiff or weak, this will place additional stress on the structures of the joint and down the front of your forearm. As such, we need to address these two elements (wrist mobility and strength) through proper exercises and stretching.
Wrist mobility/strength exercises
It should be noted that a major factor in keeping the wrists healthy and executing a lift properly is utilizing proper technique. This includes employing the right grip, aligning the body correctly and having a good bar path. Staying on top of your lifting form can go a long way in alleviating some of the work placed on the poor ol’ wrists. Of course, this doesn’t mean you shouldn’t spend a good amount of time working on the mobility of your wrists every day. We use these suckers more than we realize, and it’s really no wonder that people can develop arthritis and carpal tunnel syndrome (a condition in which there is excessive pressure on the median nerve, which allows feeling and movement to parts of the hand) if they don’t take care of them. As I hope I have emphasized, they are crucially important in CrossFit, so start incorporating them into your mobility warm-up. Here are a few exercises/stretches to get you started:
1. Wrist Rotations.
This is very basic. Wrap your fingers together and move your wrists around in every possible direction. Hold any position that feels a little tender/limited for a few seconds. Repeat often throughout the day.
2. Prayers.
Stand up and place your hands together in front of you, as if in prayer. Maintaining contact between your hands, lower them. Go as far as you can. The longer you can keep your hands together, the better you’ll stretch the wrists. At the bottom, reverse things so that your fingers point downward and your hands remain together. Come back up.
3. Static Holds.
Pull your wrist back into extension and/or flexion and hold for at least 20-30 seconds.
4. Planche push–up position.
Get into a plank position (elbows fully extended at the top of the push up). Turn your hands inward so your fingertips are pointing toward your toes. Keeping a rigid torso, shift your body forward so you have an angle from your shoulders to wrists. Hold this position for 20-30 seconds (or as long as you can bear) and repeat. If this is too intense, drop down to your knees and complete.
5. Wrist walks.
Place your palms on a wall, with your arms straight and fingers pointing to the ceiling. Keeping contact with the wall, walk your hands down the wall. Go as far down as possible without letting your palms come off the wall. Once you reach the point where you can’t walk your hands down any farther, turn your hands around so your fingers are now pointing to the floor. Walk your wrists back up the wall as far upward as possible. Repeat.
6. Front squat rack position.
If you have pain when trying to hold a front rack position, or can’t even get into it in the first place, you need to get your wrists working through the range of motion required for the front squat. Even though it’s your shoulders holding the bar in place rather than your wrists, you still need good wrist mobility to get the bar sitting correctly on top of your shoulders in the first place. Load a bar on a desired rack setting.
Set up in a rack position, with your elbows pointing as far forward as possible and weight sitting on your shoulders. Pick up the bar and rotate your elbows forward, then re rack the bar. Repeat this process until you see a change in your rack position.
7. Ring push-ups.
A great exercise to work on wrist stability, as well as stability through the elbow, shoulder and core. Adjust the height of the rings appropriate for your fitness level (the lower the rings the more difficult the exercise). Grip the rings, keep your body straight and your legs fully extended behind you. Slowly lower yourself down towards the floor. Pause at the bottom then push yourself back up to the starting position. Do not lock out your elbows to maintain tension throughout the muscles during the exercise. Repeat.
8. Double kettlebell rack walk
Take a kettlebell in each hand. Lift the kettlebells up under your chin so that your palms and your wrists are facing each other. The kettlebells should be resting on your shoulders and upper arms. Begin walking forward and hold the kettlebells at the same position the whole time. Continue for the desired amount of time or distance.
These are just a few exercises to get you started, but I hope you now understand how vital the wrists are in CrossFit and how underappreciated they are. It doesn’t take much effort to work on them—you could do them at work if needs be.
Which reminds me, make sure that if you do work on the computer a lot that your wrists are in a neutral position when typing. Just another helpful adjustment that can do wonders for the health of the joint. So, no more ignoring the wrists! They should now be the first thing you target for every mobility session.
Photo courtesy of Amanda Karnes/CC BY-NC-ND 2.0


