
Modern life has quietly engineered a movement crisis.
People sit for hours, scroll endlessly, and move through the same limited patterns day after day.
Even regular gym-goers often repeat straight-line movements that leave joints stiff and fascia restricted.
But what if six simple tests could reveal exactly where mobility has been lost—and how to get it back?
Jump to:
- Test #1: The Kneeling Sit—Ankle, Knee, and Quad Health
- Test #2: The Deep Squat—Foundation of Lower Body Mobility
- Test #3: The Toe Touch—Hamstring and Spine Flexibility
- Test #4: Behind-the-Back Reach—Combined Shoulder Mobility
- Test #5: Wall Angel—Overhead Flexibility Without Compensation
- Test #6: Thoracic Rotation—Upper Back Mobility Assessment
- What Your Results Really Mean
Test #1: The Kneeling Sit—Ankle, Knee, and Quad Health
This foundational movement reveals lower body mobility in seconds.
Start by kneeling with feet flat, then sit hips back onto heels. Heels should point straight back without flaring outward.
If sitting back feels comfortable, lower body mobility is solid. Discomfort or inability to sit fully often signals tight quads or limited ankle dorsiflexion.
The fix? Practice this position regularly with gentle dynamic movements, staying within a pain-free range.
Advanced Variation: The Lean-Back Challenge
For those who pass easily, slowly lean back while keeping knees together. Knees will naturally lift off the floor.
This variation strengthens shin muscles and improves ankle mobility while maintaining proper knee alignment.
There’s an extreme version—sitting between heels with butt on the floor—but it rotates thighs inward and stresses knees. Only attempt with already mobile, well-conditioned joints.
Test #2: The Deep Squat—Foundation of Lower Body Mobility
This test challenges ankles, hips, and upper back simultaneously.
Stand with feet shoulder-width apart, toes slightly turned out. Squat as deep as possible.
Pass criteria:
- Hips drop below knees
- Thighs touch calves
- Torso stays upright
- Heels remain flat
If heels lift or torso collapses forward, ankles or hips are likely restricted.
Progressive Improvement Strategy
Hold onto a bar, pole, or door frame. Gently pull into a deep squat position.
Stay for about 60 seconds, letting your body gradually adapt.
Once comfortable, place both hands on ground. Later, lower one arm at a time toward floor without lifting butt too much.
Test both sides and notice any imbalances. This variation requires precise control of ankles, hips, and spine—a true benchmark of full-body mobility.
Test #3: The Toe Touch—Hamstring and Spine Flexibility
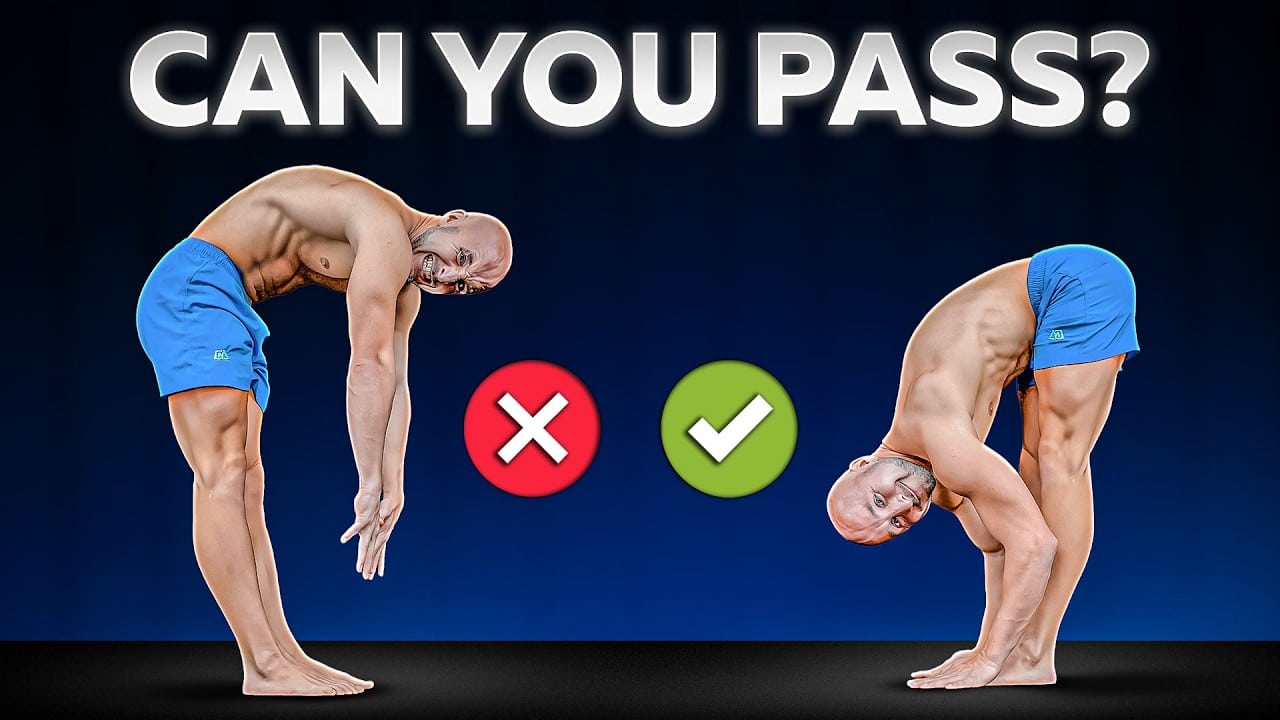
Stand tall, then slowly roll down toward floor, reaching for toes while keeping knees extended but not locked.
Can you reach them? Solid mobility. Fall short? Limited hamstring flexibility or reduced spinal flexion.
Important distinction: Unlike strength movements, spine doesn’t need to stay straight here. Roll down segment by segment, letting spine flex naturally.
A rounded spine shows how well vertebrae and hamstrings move together—exactly what this test assesses.
Practice either standing or seated toe touch regularly. Choose whichever feels better and allows controlled movement.
Advanced version requires placing palms flat on floor. Next level? Bend elbows while doing so.
Test #4: Behind-the-Back Reach—Combined Shoulder Mobility
This test measures both internal and external shoulder rotation simultaneously.
Reach one hand over shoulder and down back. Reach other hand up from below. Try making fingers touch behind back.
A noticeable gap likely indicates tightness in chest, lats, or internal rotators. Fingers coming close on both sides signals solid shoulder mobility.
It’s normal if one side is more limited.
For restricted shoulders, practice this position regularly. Stay relaxed, breathe deeply, and gently reach a little further each time.
Advanced version requires fingers overlapping on both sides. If they don’t, keep working weaker side until it catches up.
Test #5: Wall Angel—Overhead Flexibility Without Compensation
This reveals how well shoulders and upper back can flex overhead without lower back compensating.
Stand with back against wall. Gently tuck pelvis so lower back stays in contact or remains neutral.
Keep elbows straight, thumbs pointing up. Slowly raise both arms overhead and try touching wall with thumbs without letting ribs flare or lower back lift off wall.
Advanced Challenge
If that feels easy, rotate arms so palms face forward. Attempt pressing entire wrist against wall.
Achieving this while keeping back flat demonstrates excellent shoulder mobility.
Test #6: Thoracic Rotation—Upper Back Mobility Assessment
This final test measures upper back rotation—critical for healthy, pain-free movement in shoulders and spine.
Start kneeling, sitting back on heels. Lean forward, placing forearms on ground in front.
Place right hand behind back or on back of head. Rotate free shoulder toward ceiling as far as possible.
Ideally, reach around 50° of rotation through upper back. Repeat on other side and compare.
If one side feels tighter or doesn’t rotate as far, restrictions likely exist in thoracic spine or surrounding muscles.
Advanced test: Reach approximately 90° of rotation on each side.
What Your Results Really Mean
Passed all six? You’re moving better than 90% of people. Nailed all advanced versions? Likely in the top 1%.
Failed one or more? That’s completely normal.
Start with these exact positions. Spend a few minutes daily exploring ranges that feel challenging.
Bodies respond with less pain, better posture, and more freedom in every movement performed.
For structured improvement, programs like Cali Move’s Supreme Mobility adapt to individual levels, track progress, and guide users through easy-to-follow workouts designed to restore natural movement patterns step by step.
Mobility isn’t about flexibility competitions or impressive Instagram posts. It’s about moving through life without restriction, discomfort, or compensation patterns that lead to injury.
These six tests provide a snapshot of where movement has been lost—and a roadmap for getting it back.