
Forget long gym sessions and high-volume shoulder workouts with minimal payoff.
Popular YouTuber and gymnastics coach Jack Woods is sharing a minimalist method that takes less than three minutes per week — and it’s transforming shoulder strength and mobility for athletes at every level.
This isn’t a shortcut, and it’s definitely not hype. It’s one vertical pushing movement, performed with intent, that builds serious overhead power and functional range — all from home, no equipment required.
In this article, you’ll learn exactly how it works, how to start from zero, and how a single weekly set could be the smartest training decision you make this year.
Jump to:
- Why Vertical Pushing Should Be Your Shoulder Training Priority
- The Free Solution: Train From Home Using Minimal Equipment
- The Magic of a Single Weekly Set
- Step 1: Learn the Movement at “Zero” Difficulty
- Step 2: Scale the Difficulty Up Smartly
- Step 3: Perform a Full Pushing Set to Failure
- Step 4: Track Strength Gains by Progressing Foot Position
- Common Mistakes to Avoid
- Pair With Vertical Pulling for Maximum Results
- Bottom Line
Why Vertical Pushing Should Be Your Shoulder Training Priority
If you’re chasing shoulder definition, strength, and mobility all in one, vertical pushing movements are the gold standard. Specifically, freestanding handstand push-ups represent the pinnacle of overhead strength development — but you don’t need to start there.
“The goal for this movement pattern is to build up strong, mobile, great-looking shoulders,” explains the creator of this method. “Handstand push-ups are our North Star, but the journey there builds everything else — size, strength, and function.”
This type of full range vertical pushing does more than develop deltoids. It recruits the upper chest, triceps, scapular stabilizers, and even the core. Plus, the range of motion builds mobility where it matters most — overhead shoulder flexion — which supports advanced skills like handstands, presses, and bodyweight feats.
The Free Solution: Train From Home Using Minimal Equipment
You don’t need a gym membership or rings to start building this movement pattern. All you need is:
- A low platform you can place your hands on — step, bricks, or low stools
- An elevated surface for your feet — chair, box, or bench
This setup allows you to control bodyweight distribution and scale the difficulty on the fly. That’s critical for hitting your max effort — which is where the magic happens.
The Magic of a Single Weekly Set
Here’s the deal that sounds too good to be true: one set per week, less than 3 minutes, can transform your shoulder strength.
“We’re giving our body one big weekly cue to grow, and if we hit it right — max intensity, full range, and enough time under load — that’s enough stimulus to create serious gains.”
No need for multiple sessions or volume-heavy programming. It’s a maximum intensity effort, and intensity is king when it comes to building strength and muscle with bodyweight training.
Step 1: Learn the Movement at “Zero” Difficulty
Before you load anything, you need to master what’s called “zero” — a full range handstand push-up pattern without resistance. This baseline teaches:
- Movement control
- Proper shoulder positioning
- How to maintain hips over shoulders
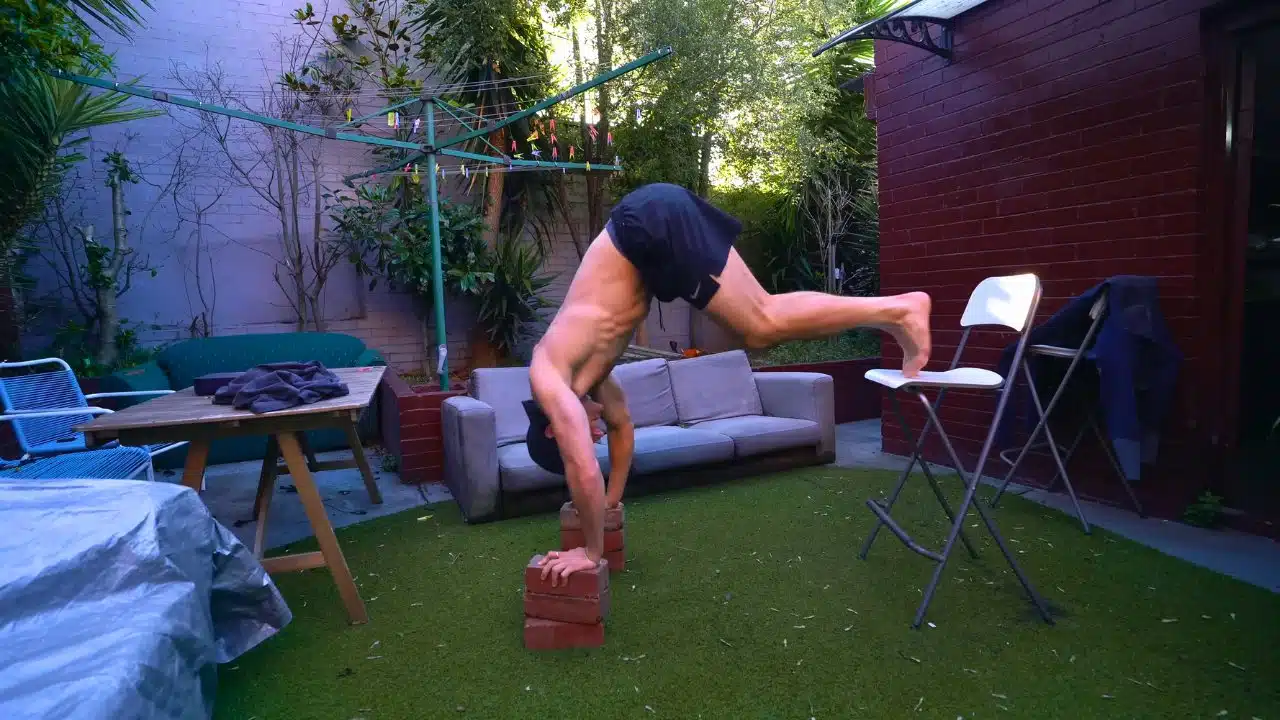
Start in the pike position with your hands on your platform and feet on the floor. Lower yourself until shoulders touch the bars, rings, or your wrists — then return to the overhead start. Your shoulders should touch your ears at the top and the equipment at the bottom. Hit these cues every time.
Form keys:
- Keep your hips high throughout the movement to stay in the vertical plane
- Keep a torso angle between 45–90° with the floor
- Use physical touch points (shoulders to rings, ears to arms) to confirm range
Step 2: Scale the Difficulty Up Smartly
Once you’ve mastered the zero, it’s time to dial up difficulty by gradually shifting more of your bodyweight onto your hands. The secret is finding that progressive overload sweet spot — just hard enough to fail while maintaining clean form.
How to Progress:
- Start in your zero position
- Bring hips over your hands and lean forward
- Elevate your feet with a sturdy platform
- Move feet forward on the platform or raise hips higher to increase loading
Everything between zero and a full freestanding handstand push-up is just adjusting how much weight is transferred from feet to hands. This makes the movement infinitely scalable — no matter your current strength level.
Step 3: Perform a Full Pushing Set to Failure
Your weekly workout is one continuous set, adjusting difficulty mid-rep as needed.
Start heavy — feet elevated and hips forward. Attempt a negative: lower slowly while trying your hardest to resist. The key isn’t to stay up, it’s to push so hard against a resistive load that you’re forced down. That’s where strength gains are made.
As you lower, if it gets too hard, shift your feet back to scale mid-rep. Once you hit bottom (shoulders touching), reverse and push up with max effort. Again, scale difficulty back smoothy as needed mid-rep to maintain effort and form. Repeat until set stops being fun — that means you’re done.
Step 4: Track Strength Gains by Progressing Foot Position
No complicated tracking method needed: just remember where you started, and what part of the rep you reached before failing.
What Counts as Progress?
- You managed to keep your feet elevated a little longer than last week
- You reduced reliance on straps or assistive surfaces
- You performed more range in a harder variation
This week-over-week micro progression is how you climb from assisted variations to your first full rep. It might take weeks or months, but every rep grows the raw muscle tissue you need to get there.
Common Mistakes to Avoid
Like any skill-based strength exercise, small form errors can stall progress quickly. Watch out for:
- Not reaching full range of motion (less muscle engagement)
- Hips sagging during the movement (ruins vertical path)
- Scaling difficulty too early or late in the rep (missed overload)
Your body should feel like one solid piece — hips stacked over shoulders, arms working through their full, strong range. Keep those touch points consistent to stay honest with your progress.
Pair With Vertical Pulling for Maximum Results
No training program is complete without push-pull balance. To support shoulder development and posture, train the opposite movement pattern as well: vertical pulling.
Use the same method — one set, once per week, max effort. Combined, this duo forms the upper body pillar of an ultra-effective minimalist bodyweight system.
Bottom Line
In less than 3 minutes per week, you can build stronger, more mobile shoulders and work your way toward elite calisthenics skills. No fluff. No extra sets. No wasted time.
All it takes is:
- One weekly max-effort set of vertical pushing
- Progressive bodyweight loading
- A commitment to full range and proper form
This kind of minimalist, intent-focused training could be a game-changer for your strength and physique. Try it for a few weeks, and see the gains start stacking up. If you’re curious how this fits into a complete 6-movement weekly plan (totaling under 40 minutes), there’s more free content available from the creator to guide you deeper. But first — go try that set. Your shoulders will thank you.