
Back pain sufferers have been sold a dangerous lie: that stretching can magically cure their symptoms.
But according to mobility expert and chronic pain survivor Conor Harris, that approach often makes things worse.
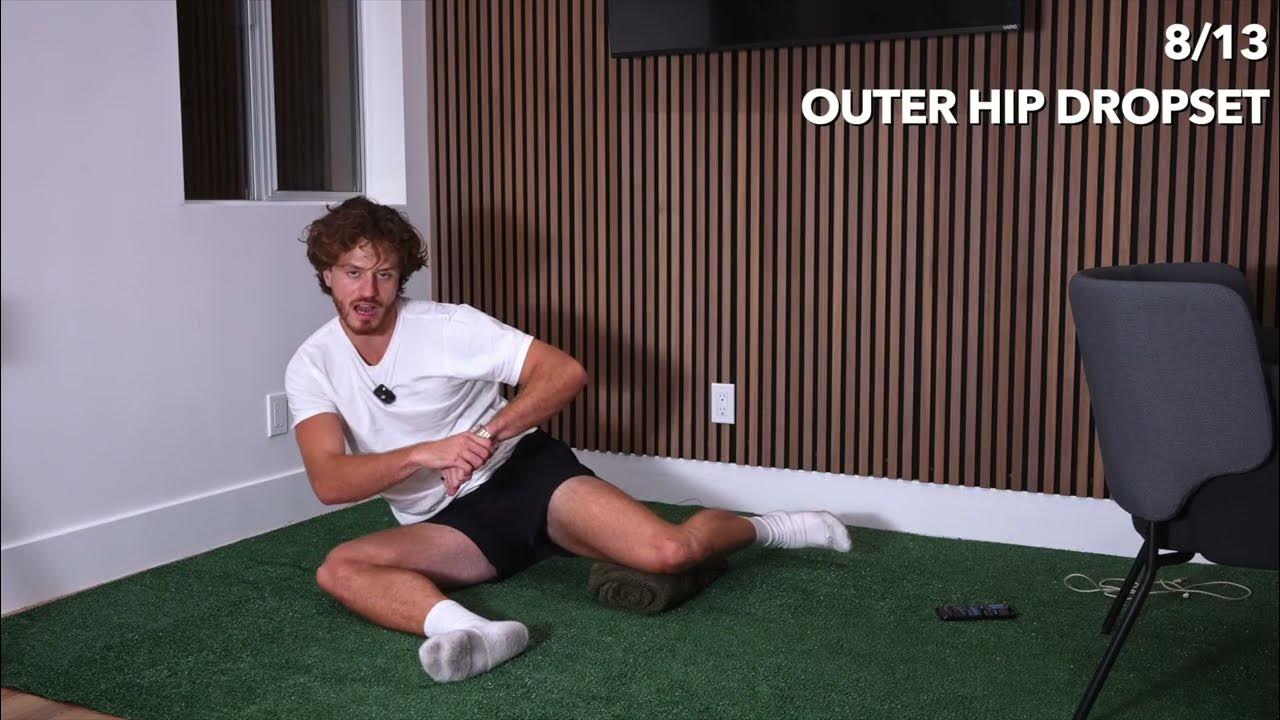
In a recent follow-along mobility video, Harris shares a ground-up flow specifically designed for people with sensitive low backs or active sciatica—and it starts as far from the spine as possible.
His unconventional method is born from four years of failed experimentation, multiple injuries, and one particularly brutal stretching session that left him nearly bedridden.
Jump to:
- Why Traditional Back Stretches Backfire
- Understanding Nerve Flossing vs. Nerve Stretching
- The Ground-Up Mobility Flow: Starting With Feet
- Hip Restoration Circuit: Building Strength in Stretch
- Active Insufficiency: Maximum Contraction With Minimal Movement
- Indirect Spine Work: The Final Progression
- Why This Approach Works When Stretching Fails
- The Long Game: Playing for Structural Change
Why Traditional Back Stretches Backfire
Harris knows firsthand what happens when desperation drives decision-making around back pain.
After herniating a disc, he developed severe compensatory patterns that cascaded into hip impingement, a sports hernia, and SI joint dysfunction.
I was someone that was stuck in chronic back pain for 4 years after herniating a disc. I then formed all these imbalances from the herniation going on my left side where I started to sit off balance. I would stand off balance.
His hips became misaligned by one to two inches, creating a domino effect of dysfunction throughout his entire kinetic chain.
The tightness became unbearable—he couldn’t sit in chairs or cars for more than ten minutes without needing to change positions.
Then came the mistake that nearly paralyzed him.
I had a day where I literally signed my death wish. I’m just going to stretch it out. I spent 30 minutes forward folding. And then I did side bending, trying to bend sideways, get deepest into the tightness I felt. I woke up the next day and I was barely better than paralyzed.
That catastrophic stretching session taught Harris what not to do—and inspired the systematic approach he now teaches.
Understanding Nerve Flossing vs. Nerve Stretching
One of Harris’s key insights involves how to treat irritated nerves, particularly the sciatic nerve.
When a nerve is already inflamed and symptomatic, pulling it apart through aggressive stretching creates more damage and pain.
Nerve flossing offers a gentler alternative that keeps the nerve moving and gliding without yanking on it.
When I do that, it tightens. Same thing with the toes. Pulling the toes up is going to put a little bit of stretch all the way down. Toes down relaxes it. So flossing is the idea of trying to move the entire nerve up and down, not stretching it, keeping things gliding properly.
Harris demonstrates nerve flossing by coordinating chin and toe movements—chin up with toes up, chin down with toes down—while maintaining a flat back and bent knee.
This coordinated movement allows the nerve to glide through surrounding tissues without experiencing excessive tension at any single point.
The Ground-Up Mobility Flow: Starting With Feet
Harris’s mobility sequence begins literally from the ground up, targeting the feet and ankles before progressing toward the spine.
This systematic approach addresses the posterior chain from its furthest point—the arch of the foot.
Phase One: Foot and Ankle Mobility
The flow starts with sitting on your heels, pushing the heelbones outward while rotating the big toes inward.
This position immediately exposes tightness throughout the entire body, particularly in the ankle and foot fascia.
Variations include alternating which foot rests flat versus being elevated on the big toe, stretching different aspects of ankle mobility and the plantar fascia.
Phase Two: Calf and Groin Integration
From the seated position, Harris progresses to bringing one leg forward while hugging the knee, creating a stretch through the calf while maintaining ankle mobility.
Leaning forward gently engages the groin without demanding excessive range from the low back.
The “camel” transition—standing from this compressed position using both legs—builds functional strength while maintaining safe spinal positioning.
Phase Three: Deep Squat Hold
Harris recommends elevating the heels during the deep squat to make staying upright easier and prevent lumbar rounding (butt wink).
Hooking elbows over knees and pulling into a compressed position—stomach to thighs—creates a passive stretch that’s held for approximately one minute.
This position opens hip mobility while keeping the spine relatively neutral and safe.
Hip Restoration Circuit: Building Strength in Stretch
After establishing foundational mobility, Harris progresses to targeted hip work that combines strength and flexibility.
Controlled Articular Rotations (CARs)
These slow, deliberate rotations move the hip joint through its full available range while maintaining knee bend.
Harris prescribes three repetitions both clockwise and counterclockwise, emphasizing control over speed.
The worse your hips get, the more strain is going to be on your back with everything else you try to do.
If clicking or restriction occurs, Harris advises opening the leg angle and reducing rotation intensity rather than pushing through discomfort.
90-90 Hip Rotations
From a 90-90 position (front knee bent at 90 degrees, back knee bent at 90 degrees), Harris demonstrates controlled rotations that test hip socket mobility.
The key technical detail: maintaining a straight line from back knee through hip to shoulder, ensuring proper hip extension rather than hip flexor compensation.
Three progression levels exist:
- Beginner: Straightened leg with simple rotation
- Intermediate: Bent knee rotation while tapping heel and knee to ground
- Advanced: Hands-free upright position testing both strength and range
Outer Hip Drop Sets
These targeted glute contractions occur in three stages, each held for 20 seconds:
- Lift foot only
- Lift foot and knee together
- Extend leg straight and lift
The goal is creating a strong contraction—almost a cramping sensation—in the outer glute muscles.
Loaded Pigeon Stretch
Immediately following the contraction work, Harris transitions to a loaded stretch position.
This strategic sequencing is intentional—the muscle pump from contraction increases internal pressure within the fascial compartment, making the subsequent stretch more effective at lower ranges.
If you just got a pump like we did with the outer hip drop set and now this is all pumped up, I can go into 80% of the stretch and I feel it.
The loaded pigeon involves lifting the back knee off the ground and hinging forward, placing bodyweight primarily on the front glute.
This creates simultaneous strengthening and stretching—a concept Harris calls “strengthening in the stretch position.”
Active Insufficiency: Maximum Contraction With Minimal Movement
One of Harris’s most innovative techniques involves exploiting a biomechanical principle called active insufficiency.
When a two-joint muscle performs both of its functions simultaneously, it experiences maximum shortening and can produce intense contractions with minimal external movement.
For hamstrings (which both flex the knee and extend the hip), this means:
- Extending the glutes forward
- Keeping knees together
- Maintaining the working knee behind the support knee
- Lifting the heel using hamstring contraction
If you extend your glute and keep your knee behind you, you are putting this hamstring muscle in the shortest contraction it could possibly be. It’s going to feel crampy as hell.
Harris applies the same principle to the rectus femoris (hip flexor and knee extensor) with the “kick out” exercise performed earlier in the sequence.
Indirect Spine Work: The Final Progression
Only after establishing foot, ankle, calf, and hip mobility does Harris introduce spine-adjacent movements.
Even these are carefully controlled and indirect rather than aggressive spinal flexion or extension.
Seated Good Morning Iso Hold
Using a chair, Harris demonstrates an isometric hold in a hinged position with hands behind the head.
Critical form cues include:
- Maintaining a flat or slightly arched back—never rounded
- Knees positioned slightly wider than squat stance
- Knee angle slightly more than 90 degrees
- Leading with the belly button forward
- Actively pushing knees outward during the hold
The hold lasts 90 seconds, but Harris emphasizes only descending as far as spinal position can be maintained perfectly.
Staying higher with proper form beats going deeper with compensation.
Single-Leg Extensions and Hip Flexor Stretches
The sequence concludes with 15-second single-leg extension holds (exploiting active insufficiency) followed by 30-second hip flexor stretches.
For the hip flexor stretch, Harris positions one foot on the chair with the back leg extended, torso upright.
Deep diaphragmatic breathing into the stomach naturally increases stretch intensity through increased intra-abdominal pressure.
The final movements include gentle hamstring work—either through bent-knee hinges or wall-supported stretches—always staying at 70-80% intensity rather than maximum range.
Why This Approach Works When Stretching Fails
Harris’s philosophy fundamentally challenges the “quick fix” mentality that dominates back pain content.
You can’t stretch out back pain. It’s a fallacy. The reason your back is sensitive and tight is because it’s messed up. You haven’t gotten proper circulation. You haven’t gotten good contraction there. The firing patterns are off.
Aggressive stretching of an already compromised spine reinforces dysfunction by damaging tissue that lacks proper neural control, circulation, and strength.
The alternative pathway Harris advocates:
- Restore mobility in peripheral joints (feet, ankles, calves, knees)
- Build hip strength and control through CARs and loaded stretches
- Address indirect spinal movements through isometric holds and controlled ranges
- Gradually progress to spine-specific work like back extensions once neurological trust is established
This progression respects the reality that a sensitized nervous system requires months of patient, consistent work—not 30-second miracle fixes.
The Long Game: Playing for Structural Change
Harris is transparent about timelines and expectations.
Building tolerance to positions like sitting on the big toes can take six months of regular practice.
Progressing from hands-supported hip rotations to hands-free variations requires consistent strength development.
Achieving pain-free spinal flexion demands structural improvements that accumulate through micro-changes over extended periods.
Play the long game, stay in. The macro six months should look like a completely different story.
This mobility flow represents a complete philosophical shift from symptom chasing to root cause addressing.
Rather than asking “what stretches will make my back feel better right now,” Harris’s approach asks “what systematic progression will rebuild trust, circulation, and control throughout my entire kinetic chain?”
For anyone trapped in the cycle of temporary relief followed by recurring pain, this ground-up methodology offers something conventional stretching never could: actual structural change that compounds over time instead of damage that accumulates with each desperate stretching session.