
Foam rolling has become a staple in many runners’ recovery toolkits—and for good reason. With just ten minutes a day, this low-tech technique can help ease tight muscles, reduce soreness, and prevent injuries that might otherwise sideline a training plan.
Whether it’s done before a run to warm up, afterward to cool down, or on recovery days to keep tissues supple, foam rolling plays a vital role in a runner’s overall performance and well-being.
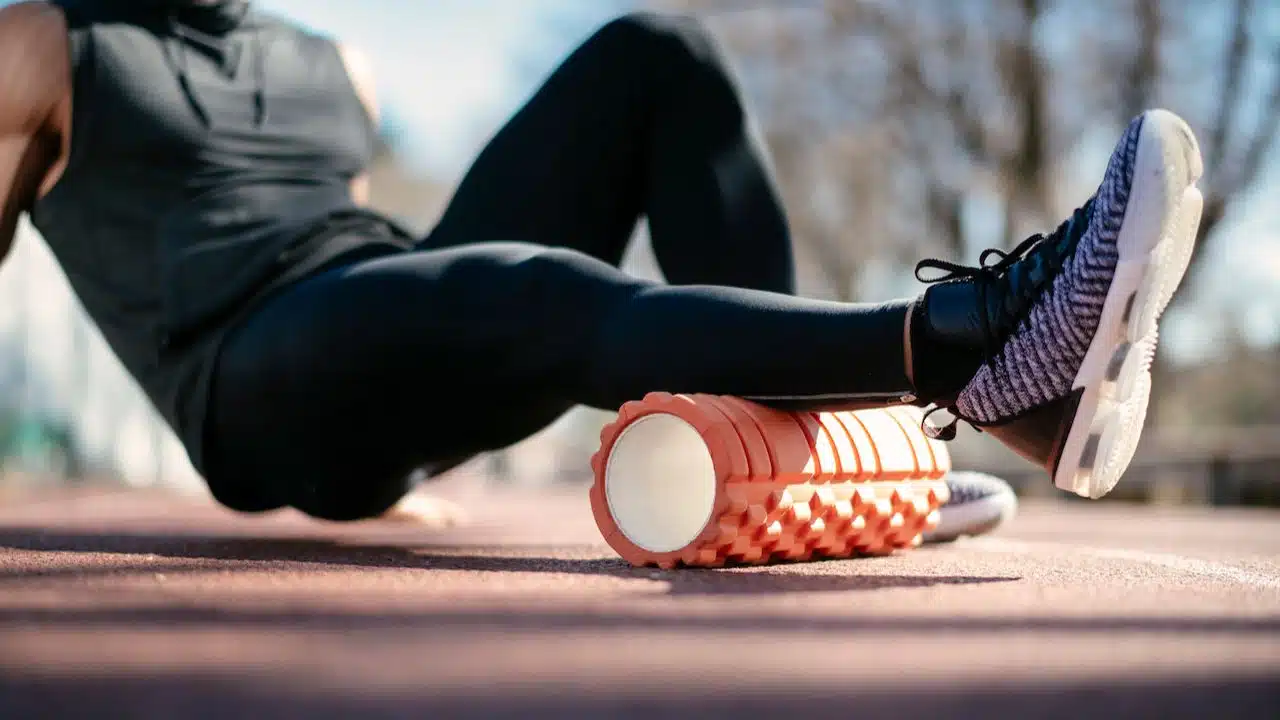
Foam rolling is essentially a form of self-massage, known as self-myofascial release. It targets the fascia—the thin layer of connective tissue surrounding muscles—to release tension and improve mobility.
“It’s one of the easiest, most cost-effective ways to aid muscle recovery and performance,” says Dr. Rachel Lawson, DPT, a physical therapist specializing in endurance athletes. “But the key is knowing how to do it properly.”
Jump to:
Why Foam Rolling Matters for Runners
Running places high and repetitive loads on the lower body, leading to tightness, inflammation, and micro-tears in muscle tissue. Without proper recovery, that tension builds over time—setting the stage for reduced mobility and overuse injuries like runner’s knee or Achilles tendinopathy.
Foam rolling helps counteract this by:
- Breaking up fascial adhesions that limit movement
- Reducing post-exercise soreness by calming the nervous system
- Improving blood flow, which delivers oxygen and nutrients to damaged tissues
- Increasing flexibility, especially when done consistently
- Enhancing performance by allowing muscles to contract and stretch more efficiently
Research published in the Journal of Sports Rehabilitation found that foam rolling improves short-term range of motion without negatively affecting strength or performance—making it ideal before runs as well as after.
Muscles Runners Should Be Targeting
To maximize benefits, runners should focus on the major muscle groups involved in running stride mechanics. This includes:
- Calves (Gastrocnemius and Soleus)
- Hamstrings
- Glutes and Piriformis
- Quadriceps
- Hip stabilizers (e.g., Tensor Fascia Latae, Adductors)
- Upper back muscles (especially rhomboids and lats)
- Plantar fascia (the bottom of the feet)
- Tibialis anterior (the shin muscle)
It’s just as important to know what not to roll. Avoid applying direct pressure to:
- Joints like knees and elbows
- The spine
- The abdomen or cervical (neck) region
“Foam rolling should never be painful,” says Lawson. “Discomfort is okay, but pain means you’re likely irritating a structure rather than helping it.”
Tools You’ll Need
The classic foam roller still reigns supreme, but different tools can help access different areas:
- Full-length foam roller: Ideal for larger muscles like quads, hamstrings, and calves.
- Firm roller (medium density): Allows deeper pressure without causing bruising.
- Massage or lacrosse ball: Great for small, hard-to-reach areas like the piriformis or the arch of the foot.
Avoid ultra-soft rollers, which compress too easily and fail to release deep fascial tension. On the flip side, heavily spiked or overly hard rollers can cause bruising or inflammation—especially for beginners.
How to Foam Roll the Right Way
Technique matters just as much as frequency. To get the most out of each session:
- Use slow, controlled movements—no rapid rolling
- Move with the muscle fibers (up and down, not side to side)
- Spend 10–20 seconds on knots or sore spots, lingering gently
- Aim for 30–60 seconds per muscle group, up to 2 minutes max
- Turn feet or limbs inward and outward to target different fibers
- Control intensity by shifting body weight or crossing legs
Never roll over bones or joints. And don’t foam roll directly on a fresh injury—especially within the first 72 hours. That can worsen swelling and slow healing.
A Complete Foam Rolling Routine for Runners
This full-body routine takes around 10–12 minutes and is ideal post-run or on recovery days. You can also perform a shortened version before workouts, focusing on tighter areas for 20–30 seconds each.
1. Calves (Soleus and Gastrocnemius)
Sit with one leg extended on the roller and the other foot on the floor.
Lift your hips and roll from the ankle to just below the knee.
Turn your foot in and out to reach different areas.
To increase pressure, cross the other leg over the one being rolled.
Spend about 45–60 seconds per leg.
2. Hamstrings
Place the roller under your thigh, starting near the glutes.
Roll halfway down the hamstring, turning your foot inward and outward to target inner and outer fibers.
For deeper pressure, stack your legs.
Repeat for the opposite side.
3. Glutes and Piriformis
Sit on the roller, cross one ankle over the opposite knee.
Tilt toward the glute of the bent leg and roll around the outer hip.
Focus on the “back pocket” area—this is where the piriformis sits.
Adjust by straightening the leg to target more glute max, or keeping it crossed for piriformis.
4. Quadriceps
Lie face down in a plank position, roller beneath thighs.
Roll from hip to just above the knees, keeping core engaged to avoid arching the back.
To target inner quads, widen your stance and point toes out.
Cross one leg over the other to isolate each quad if more pressure is needed.
5. Adductors (Inner Thighs)
Lie on your side with the roller horizontal.
Bend the top leg and place it over the roller at the inner thigh.
Roll from groin to knee.
Use your hands and the opposite leg to adjust pressure.
Repeat for the other leg.
6. Upper Back (Thoracic Spine)
Position roller at mid-back level, arms crossed over chest or behind head.
Lift your hips and slowly roll toward the upper shoulders.
Avoid rolling the spine directly.
Focus on lats and rhomboids.
7. Feet (Plantar Fascia)
Using a massage ball, place it under the arch of your foot.
Apply gentle pressure and roll slowly from heel to toes.
Spend 30–60 seconds per foot.
8. Shins (Tibialis Anterior)
Lie on your side, roller beneath the outside edge of your shin.
Roll from just below the knee to above the ankle, avoiding the shin bone.
This area is critical for runners prone to shin splints.
Cross legs for added intensity, using arms to support your weight.
Foam Rolling Before vs. After Runs
Foam rolling can be used both as a pre-run warmup and post-run recovery tool—each with slightly different goals.
- Before a run: Use lighter pressure, shorter durations (20–30 seconds per area). Focus on areas that tend to tighten up, like calves or hip flexors. This preps the tissue without fatiguing it.
- After a run: Spend more time (30–60 seconds per group) and use moderate pressure to flush out metabolic waste, reduce soreness, and improve circulation.
Common Mistakes to Avoid
Many runners don’t get the full benefit of foam rolling because of small but crucial errors:
- Too much pressure: Bruising isn’t recovery—it’s trauma.
- Rolling too fast: Fascia needs slow pressure to release.
- Neglecting sore spots: Avoidance reinforces tension.
- Rolling injured areas: Don’t roll within 72 hours of a strain or impact injury.
- Rolling the IT band directly: Focus instead on the tensor fascia latae and surrounding muscles.
When to Avoid Foam Rolling
Certain health conditions may make foam rolling risky or ineffective. Check with a healthcare provider if you:
- Take blood thinners
- Have a bleeding disorder
- Have osteoporosis or brittle bones
- Experience peripheral neuropathy
- Are recovering from a suspected stress fracture
“If you’re unsure whether foam rolling is safe for you, speak with a PT or sports medicine provider first,” says Lawson. “It’s a great tool—but not the right one for every situation.”
Foam Rolling: Small Effort, Big Impact
Runners often spend hours on miles, pace, and shoes—but just minutes on recovery. Adding foam rolling to your routine can make a dramatic difference in how your body feels and functions over time.
It’s not a replacement for smart training, proper hydration, or good sleep, but it is a powerful addition to any runner’s self-care strategy.
Stay consistent, keep it gentle, and focus on the muscles that work hardest. Your next run might just feel lighter, smoother, and more enjoyable than the last.